3 Methods to Disable Synology HDD/SSD Compatibility Warning
Orignal Question : Hi Akash, I am told by a supplier that they can modify synology so it will work even with non-compatible drives. What is your take on this ?
First thing first - Disabling the compatibility warning doesn't have any advantage
Disabling the compatibility warning is not a concern while there is no benefit other than the warning in the volume is suppressed.
With NVMe you may be able to create a volume (something Synology typically restricts unless using their own SSD). However, adequate cooling is crucial in this scenario.
I would say leave the comaptibility settings the way Synology has kept them, but here are three methods by which you can disable the disk compatibility check on Synology.
Method 1 : Disable the Disk compatibility support by editing /etc.default/synoinfo.conf
Disabling the disk compatibility check is the most straightforward process. Since the compatibility check is completely bypassed, you don't have to worry about finding your HDD model and firmware. Another advantage of this method is that, since the file is stored in etc.default, it is less likely to be affected by a DSM upgrade. Whatever changes you make persist.
Advantage of this method
- You edit a file yourself, you don't have to download a third-party script and worry about security
- Easy to configure, just one parameter change
- Change is persistent even after DSM update
To initiate this, the first step is to enable SSH on your Synology. It's important to remember to disable SSH promptly once the task is completed.
To enable SSH,
Go to Control panel > terminal and SNMP > enable SSH
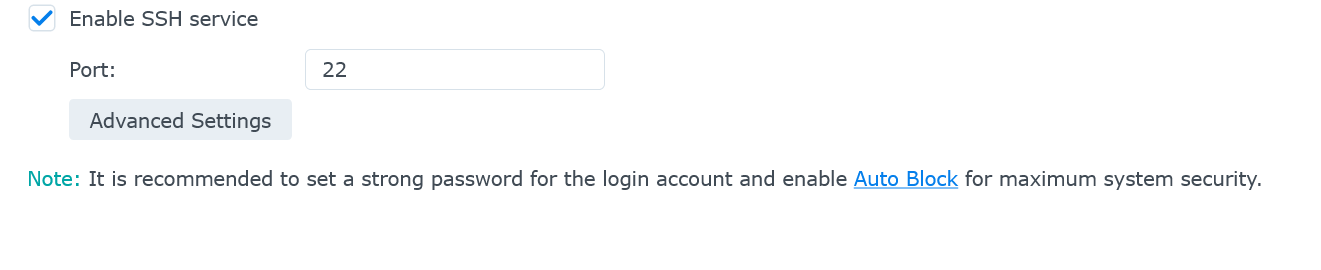
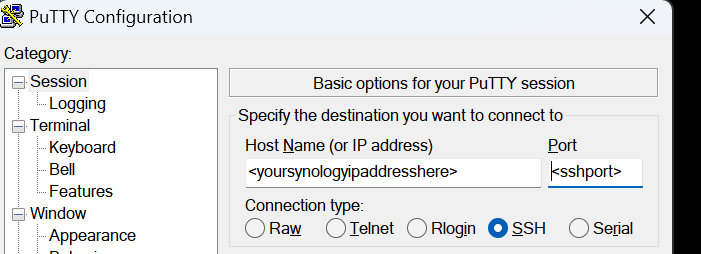
The default port is 22, but you can choose any other port , use the same port number when connecting via Putty. Ensure to use the Synology IP address along with the specified port for the SSH service.
Login to the terminal and now you are able to execute commands on your Synology. Now, let's walk through the process as if you're unfamiliar with the location of the file requiring modification (this is how I discovered the file).
Initially, you must identify the file containing the compatibility support parameter. The command below will display all files with the keyword 'compat' in them. It will retrieve any file containing terms like 'compatible,' 'compatibility,' 'disk_compatibility,' 'disk_compatible,' and so forth. Although you can skip this step, if you're curious about how one would pinpoint this file amid a multitude of files, this is the starting point.
sudo grep -Rn '/' -e 'compat'

# sudo gives you elevated priviledge to run script as superuser
# grep to find string
# -Rn : R = recursive/see in all sub-directories, n = output line number so you know on which line the string exists
It returns many listings, this is the file you are looking for
/etc.default/synoinfo.conf:172:support_disk_compatibility="yes"

# 172 is the line number on which it finds the string in file
Now all you need to do is edit the synoinfo.conf files, and change line number 172 to No instead of yes. To Edit you can use VIM editor which is by default present in all linux installations .
sudo vim /etc.default/synoinfo.conf

# sudo to run as super user , you can't edit this file as normal user
# vim to invoke the editor followed by the file name
VIM differs from a typical text editor like Notepad as it doesn't a graphical interface and menu so it takes a little learning
Upon opening VIM, you enter the command view. To make edits to the file, switch to edit mode by pressing 'i.' In the bottom right corner, you'll find the line numbers, simplifying the process of scrolling to line 172.

Scroll down to the line number 172 and change support_disk_compatibility="yes" to no. To save your file first press 'escape' so you go back to command view. Now type ":wq" so that your file is written and saved.
Method 2 : Manually Edit the Synology compatibility database file to include your hard drive models
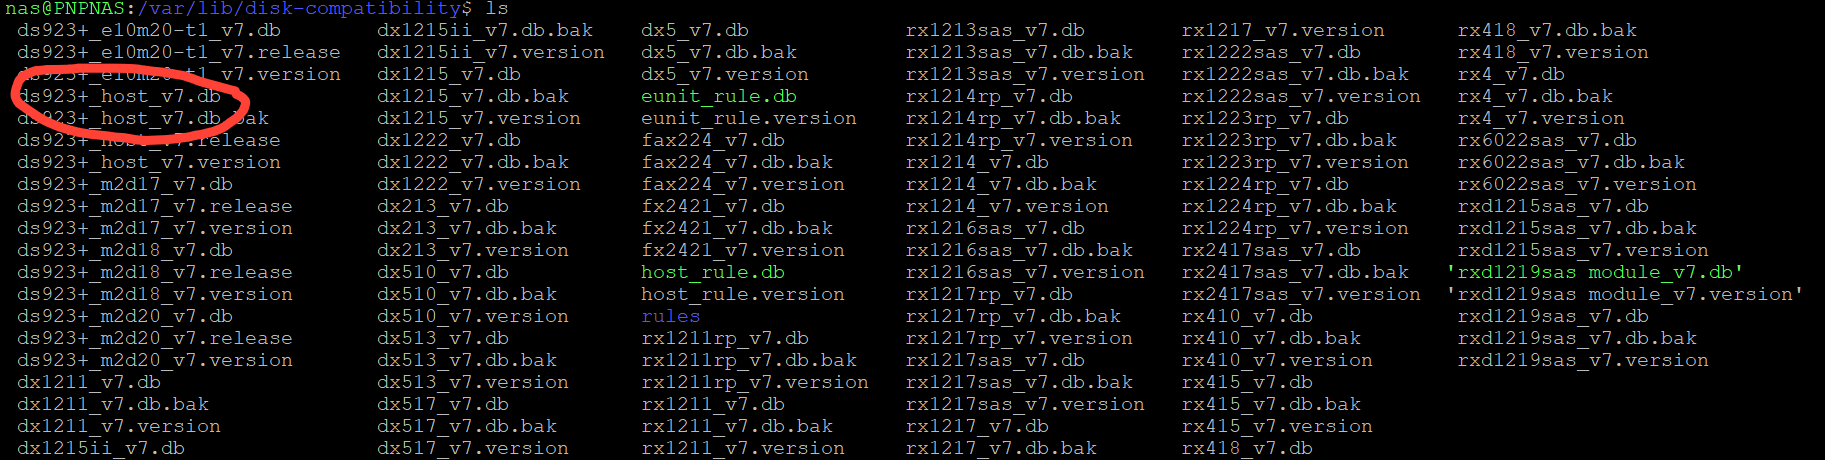
The database file is locally stored on your Synology, and it automatically updates whenever new models are released. It means that any alterations made to the database file will not be persistent. The database files are located in the following directory:
/var/lib/disk-compatibilityYou will see many many files inside and the file you need to edit is the file that has your device model number with .db extension. Other files are meant for the expansion units.
To modify this database file, you can utilize VIM as previously explained, but be aware that the format is intricate, resembling JSON. Understanding the pattern is essential, and edits should align with that structure.
I don't recommend this method but I have mentioned it for the sake of thoroughness.
Method3 : Use a third-party shell script to automatically modify Synology hard drive database
An alternative and user-friendly method is available. A script authored by a user named 7revad can automatically detect your hard drive models and incorporate them into the local database. Given its script nature, you can also schedule it to run conveniently through the Synology interface.
 007revad
The script comes with an excellent tutorial, so I won't replicate it here. You can visit the provided link to access the script and follow the instructions on how to execute it. However, a word of caution: only run third-party scripts if you are confident that the script is completely secure and safe.
This script comes from a well-reputed user and many people have used it also. However, you should always be a little prudent in running any script on your Synology