Easiest way to Install a Complete Media Automation Stack on Ugreen ( arr suite - Sonarr, Radarr, Prowlarr, bazarr, Jellyfin, Plex, transmission + VPN)
Prefer watching over reading? This guide is also available on YouTube
If you ever wanted to automate your media where searching, downloading, organizing, and streaming happens automatically , then this is the stack to deploy. I will show you how to install it on your Ugreen without having to run any command at all. we will do it all with the Ugreen Docker app.
The apps we will use are
- Sonarr : TV show automation
- Radarr : Movie automation
- Prowlarr : Indexer manager
- FlareSolverr : Bypass Cloudflare-protected indexers like 1337x
- Bazarr : Subtitle management
- Jellyfin & Plex : Media streaming
- Gluetun + Transmission : Torrenting safely via VPN
Other than transmission , nothing else goes via vpn so you save your vpn bandwidth only for torrents.
Once configured Sonarr/Radarr find content, Prowlarr supplies indexers ( where the media is - the torrent file for media), Transmission downloads your torrent via vpn, Bazarr fetches subtitles and Jellyfin/Plex serve media. Fully automated you just have to search for media in Sonarr and Radarr.
Folder Structure
We create all the required directories automatically when the containers start for the first time. Your project directory becomes the single root for everything.
project/
├── downloads/
├── tv/
├── movies/
└── config/
    ├── sonarr/
    ├── radarr/
    ├── prowlarr/
    ├── bazarr/
    ├── jellyfin/
    ├── plex/
    ├── transmission/
    └── gluetun/
downloads/is used for temporary downloads by transmission, once complete they move totv/for series andmovies/for filmstv/and/moviesare used for tv and movies storage which are read by Jellyfin and plexconfig/has several folders one for each service configuration storage.
Install Step 1 : Find your PUID and PGID
We use PUID and PGID of current logged in user to ensure that there are no premission issues later.
Login to your UGOS -> Click on docker app -> Project -> Create new -> Take note of PUID/PGID Just above the YAML paste area. Replace this in the environment file below
Save this file as env.env on your computer ( or any other name doesnt matter. finally we will upload it to ugreen, rename it as .env )
PUID=1000
PGID=10
TZ=Asia/Dubai
CONFIG_DIR=./config
DOWNLOADS_DIR=./downloads
TV_DIR=./TV
MOVIES_DIR=./Movies
Install Step 2 : Find your VPN service provider credentials and settings
You can find the settings for your service provider here.
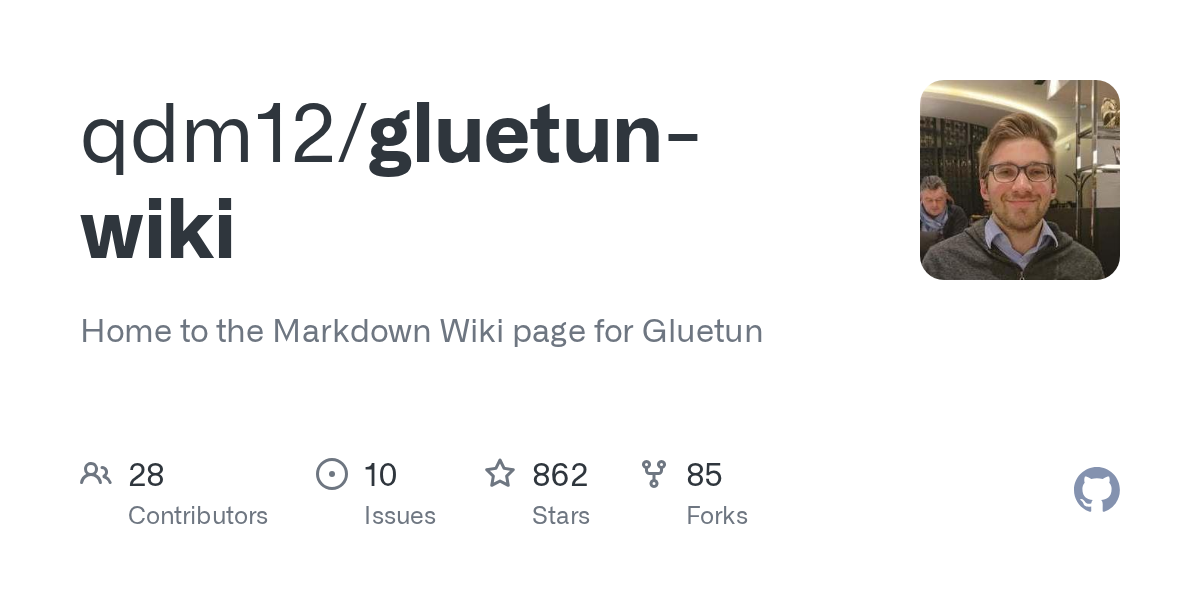
GLUETUN PROVIDERS - CHECK FOR YOUR PROVIDER CONFIG HERE
In the Docker Compose file, you only need to edit the Gluetun service section (under service: gluetun):
    environment:
    # https://github.com/qdm12/gluetun-wiki/tree/main/setup/providers -> check for your provider here
    - VPN_SERVICE_PROVIDER=protonvpn
    - OPENVPN_USER=youruser
    - OPENVPN_PASSWORD=yourpassword
    - SERVER_COUNTRIES=Netherlands
Remember - This username and password is not your regular VPN account email or password. Most VPN providers generate separate credentials specifically for OpenVPN / WireGuard. These are created inside the provider’s dashboard or console. For example for ProtonVPN you have to generate OpenVPN credentials in the account dashboard. If you use your normal login password, the VPN will not connect.
Install Step 3 : Prepare your compose file
Download the Docker Compose YAML file from the link below. Edit only the Gluetun section and update it with the VPN credentials you identified in Step 2. Save it as compose.yaml on your computer
OUR COMPOSE FILE. COPY AND PASTE , CHANGE GLUETUN CREDENTIALS
Now you have 2 files - one env.env file and one compose.yaml file. These are all we need to create our application
Install Step 4 : place your yaml and env files on Ugreen.
- Go to your Files app on Ugreen. go to
shared folder \dockerand create a directory , lets saystackhere. - Upload your
env.envfile here - right click on the file and rename it to
.envwhen you do that it will become a hidden file and will disappear.
Now your environment file .env is inside shared folder \docker\stack. we have to make sure that we make this our project directory.
- Go to docker -> projects -> create
- give the name
stackto the project. when you do this, it will automatically pickshared folder \docker\stackas your project directory. If you give any other name, you would have to click on directory and pick this directory - Paste the content of your
compose.yamlfile that you created in step 3 in the yaml area and click deploy
Now it will pull each image, create your network and make the containers. if all goes well you will see all the containers running. check specially if gluetun container is running without any errors. If there are errors , your credentials are not correct.
Once everything is running you can go to configuring your stock
Config Step 1 : Make sure your directories have right permission
Go to your file app , navigate to your TV directory under shared folder \docker\project name , right click on it and set permissions to read/write for the logged in user. It would show permissions already exist, but do it again.
If you skip this, you might get the error folder not writable by user abc in sonarr and radarr when you add media folder.

Config Step 2 : Sonarr /Radarr configuration
Sonarr is running on port 8989 . you can access it on nasip:8989 or by clicking on the container -> quick access arrow. Radarr can be accessed on nasip:7878
4 settings you have to do in both sonarr and Radarr are as follows.
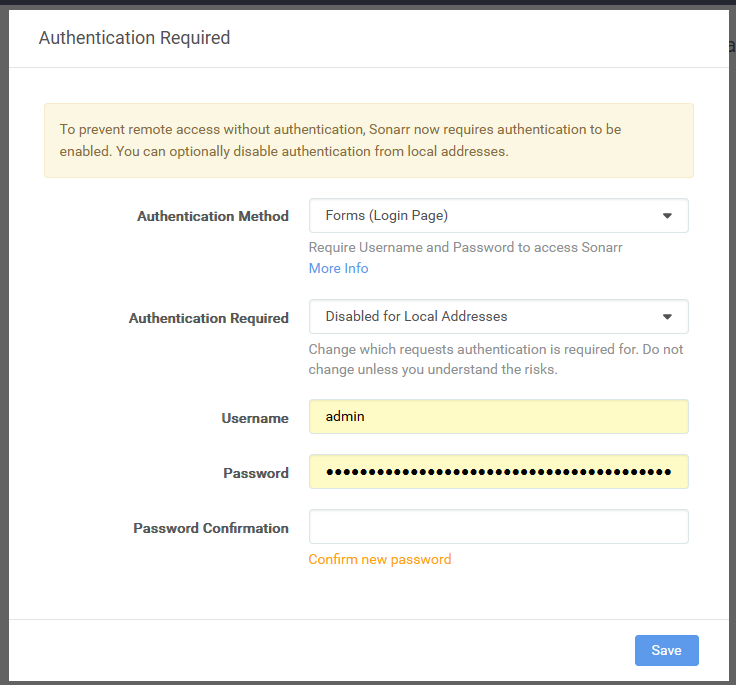
- It will ask you create an authentication method you can use forms or popup. Make sure that authentication is disabled for local addresses
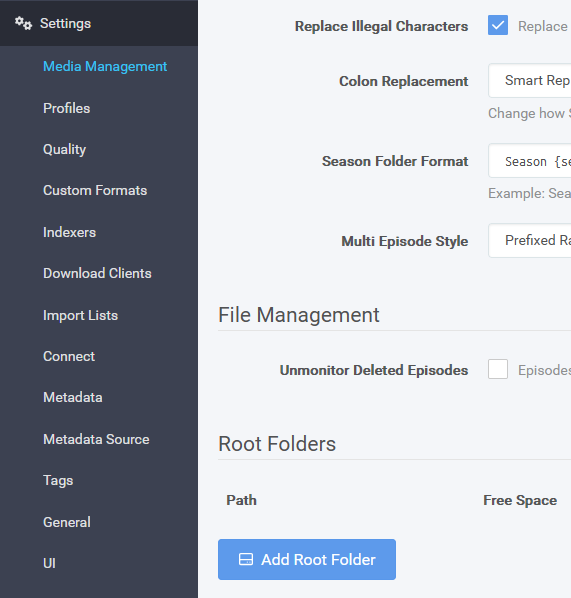
- Go to settings-> media management -> add root folder and add
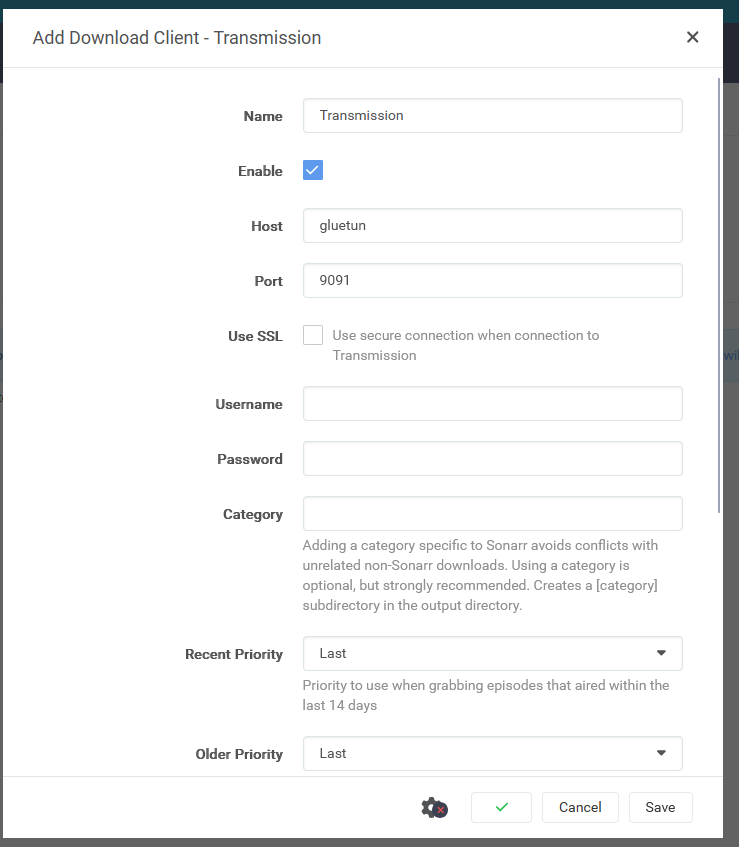
TVfolder here for sonarr. For Radarr you will addMoviesfolder - Go to settings-> download clients -> + -> transmission and use the host as
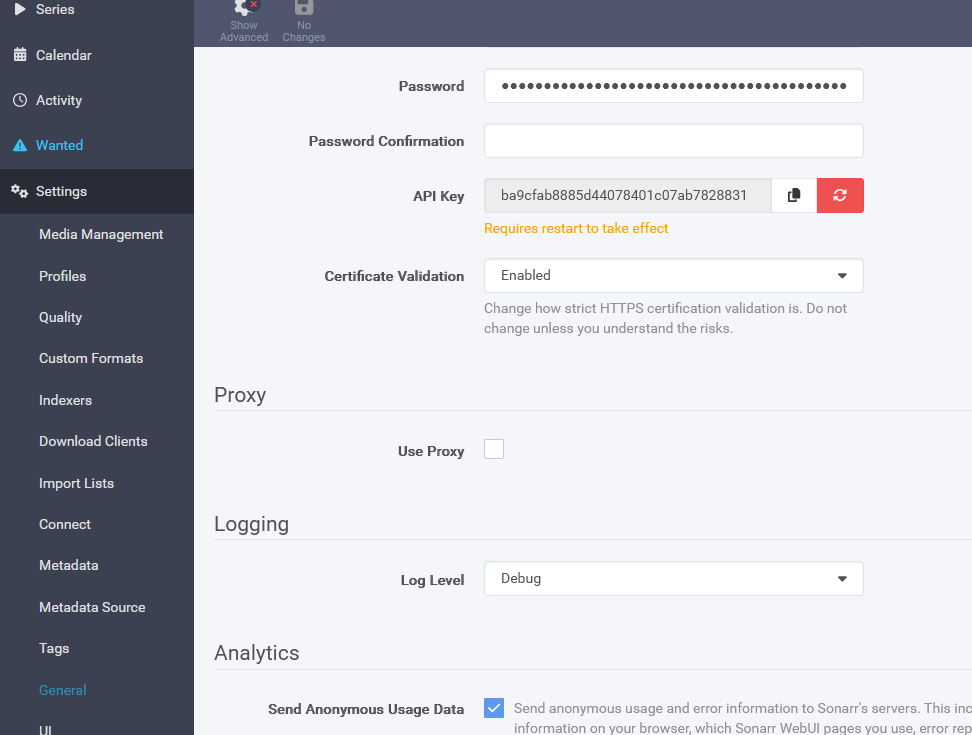
gluetunhere. Remove category - Settings -> general-> API key. Copy this key for prowlarr config.
Config step 3 : Prowlarr Configuration
Prowlarr is on nasip:9696 . Access this and
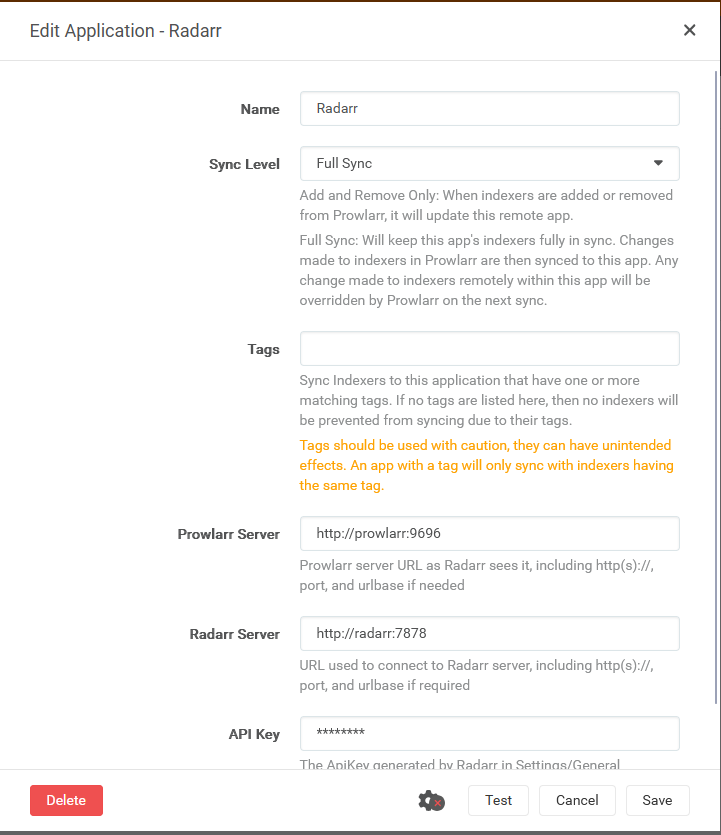
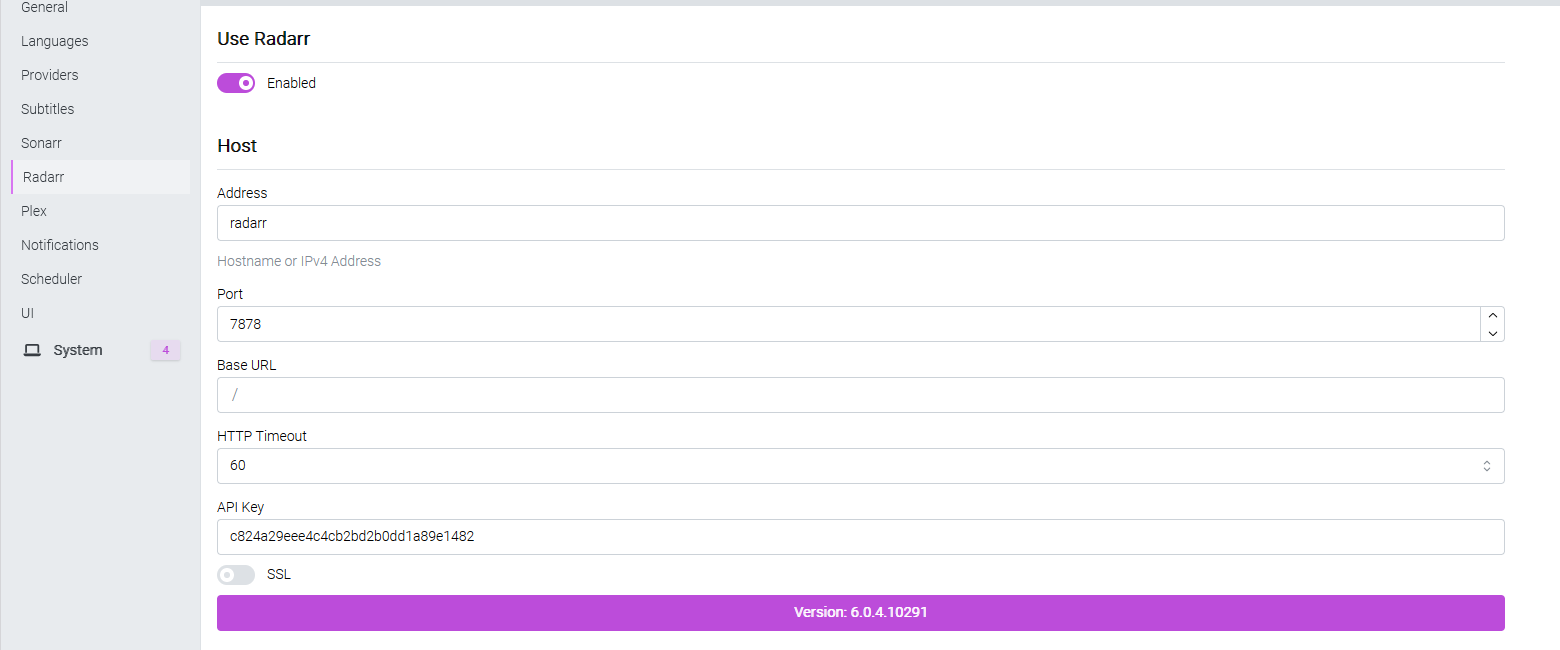
- Settings-> apps -> Radarr . use the following url
prowlarr server :http://prowlarr:9696
radarr url :http://radarr:7878
API key : what you found in config step 2 for Radarr - Settings-> apps -> Sonarr . use the following url
prowlarr server :http://prowlarr:9696
Sonarr url :http://sonarr:8989
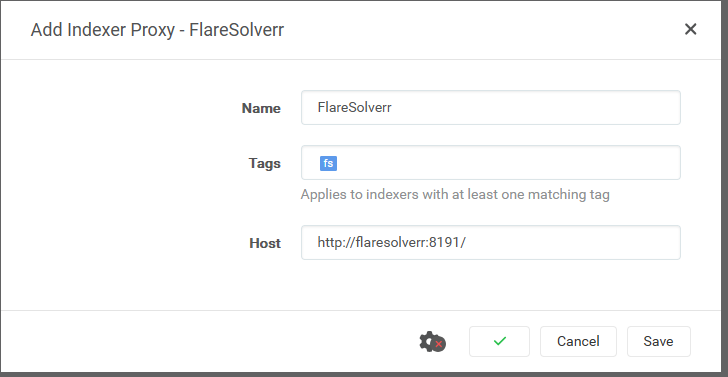
API key : what you found in config step 2 for Sonarr - Settings -> indexers-> + -> flaresolverr.
Tags : use a tag, sayfs
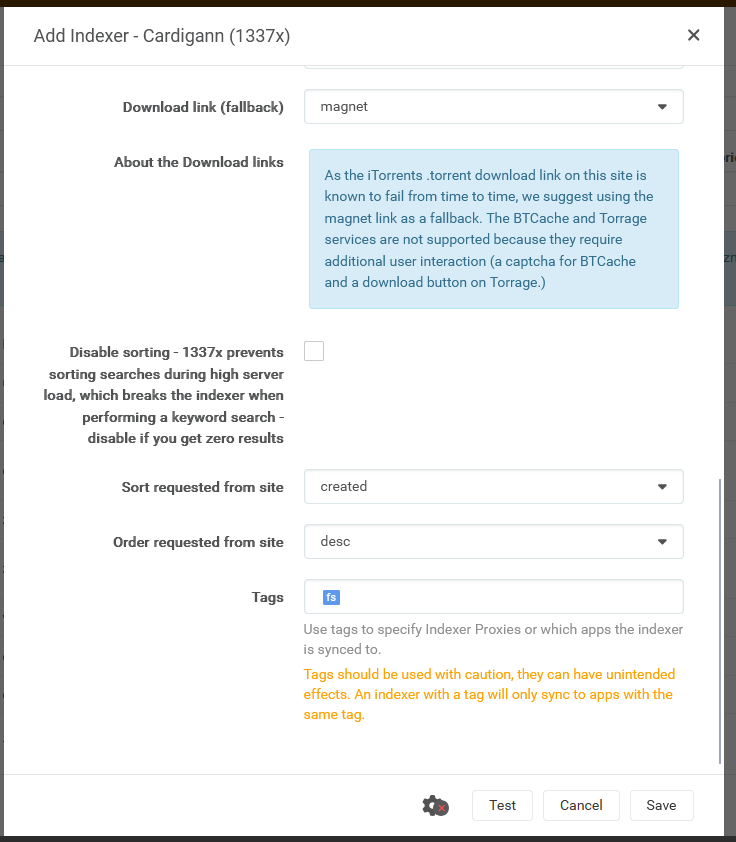
Host : usehttp://flaresolverr:8191 - Indexer-> add indexer -> choose an indexer.
If the indexer needs cloudflare solver, use the tagfswhat we used for flaresolver. If not, leave the tag empty and add. Add as many indexers as you want. They will automatically be synced with Sonarr and Radarr.
Config Step 4 : Bazarr configuration
bazarr is on ipaddress:6767 . Access it and
- Provider-> Enable provider and add your subtitle provider
- settings -> sonarr
Address:sonarr
API Key : your sonarr api key - Settings -> Radarr
address : radarr
API Key : your radarr api Key
This is all you need to do. Now you shoudl be abel to go to Sonarr/radarr , search for any media file and add it to your library. It will automatically download the files.
