Running Pi-hole + Unbound on Ugreen With MacVLAN
Most people install Pi-hole to block ads and some people install Unbound for privacy. The two combined is a very powerful adblocking private dns server.
We will set up Pi-hole to filter out ad and tracking domains, and it will use Unbound for upstream so all DNS queries stay private. The result is simple: cleaner browsing and your own privacy-first DNS server. No ISP logging your queries, no ad networks profiling you.
How it works , before and after
Before the actual setup, here’s a simple, non-technical primer on what’s really happening under the hood. You can skip this section if you like, this is go give you an idea of what we are setting up.
Without Pihole + Unbound
Before this setup, every time you visit a website ( say bbc.com) your computer asks a DNS server, “What is the IP address of bbc.com?” That DNS server now knows exactly which site you’re visiting.
This process is called name resolution- converting a website name into its actual IP address. DNS server as like a large directory (oversimplifying a bit) that has
mappings of domain names to their corresponding IP addresses
Now your browser loads bbc.com (technically its IP address) and then discovers that the page needs many other things too like ads, trackers,analytics. An ad from ads.google.com for example. Once again, your computer asks the DNS server for the IP address of ads.google.com. And for every other element on the page.
Now little by little, your DNS provider ends up seeing everything, every search, every site you visit, every service that the site you visited loaded - everything.
So there are 2 problems you have - one , you have ads server and you want to block them ( pihole will do this), and you want a private dns so nobody knows which sites you visit ( unbound will do this)
With Pi-hole + Unbound
Now when you visit bbc.com
- Your computer asks Pi-hole for the IP address of bbc.com
- Pi-hole checks: Is this an ad or tracking domain? No. So it will ask unbound for the IP. Unbound privately looks up and send the IP back.
- site loads and tries to load ads.google.com. Your computer again asks pihole for the ip address of ads.google.com
- Pi-hole already knows this is an ad domain. It says no IP for this domain. So the ad never loads
Step 1 : Create a Macvlan on Ugreen
In most of my tutorials, I use bridge or host networking. But for this setup, we’ll use macvlan because DNS works on port 53. While you can technically run a DNS server on any port, clients will always expect it to be available on port 53. That’s simply how DNS is designed.
On UGREEN NAS, port 53 is already used by the built-in dnsmasq service. So we can’t bind Pi-hole to that port on the host, and this is where macvlan comes in.
Macvlan gives our container its own IP address directly on the LAN.
No sharing the host’s IP (host mode). No NAT and port forwarding to an internal IP (bridge mode). Instead, the container appears like a real machine on your network, behind a virtual switch. Run any service on this independent from host.
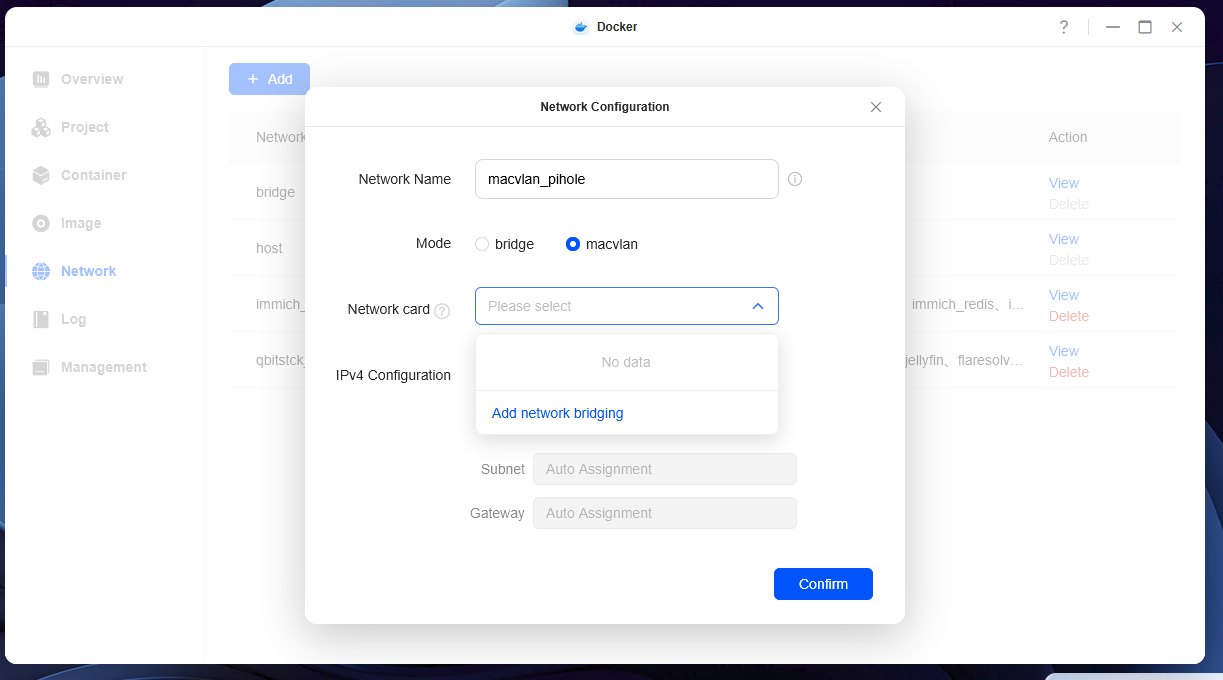
- Go to Docker -> Network -> + Add
- Network name use
macvlan_pihole. choose the mode as macvlan - Drop down the network card, there will be nothing to select, till you create a network bridge . Click on network bridge
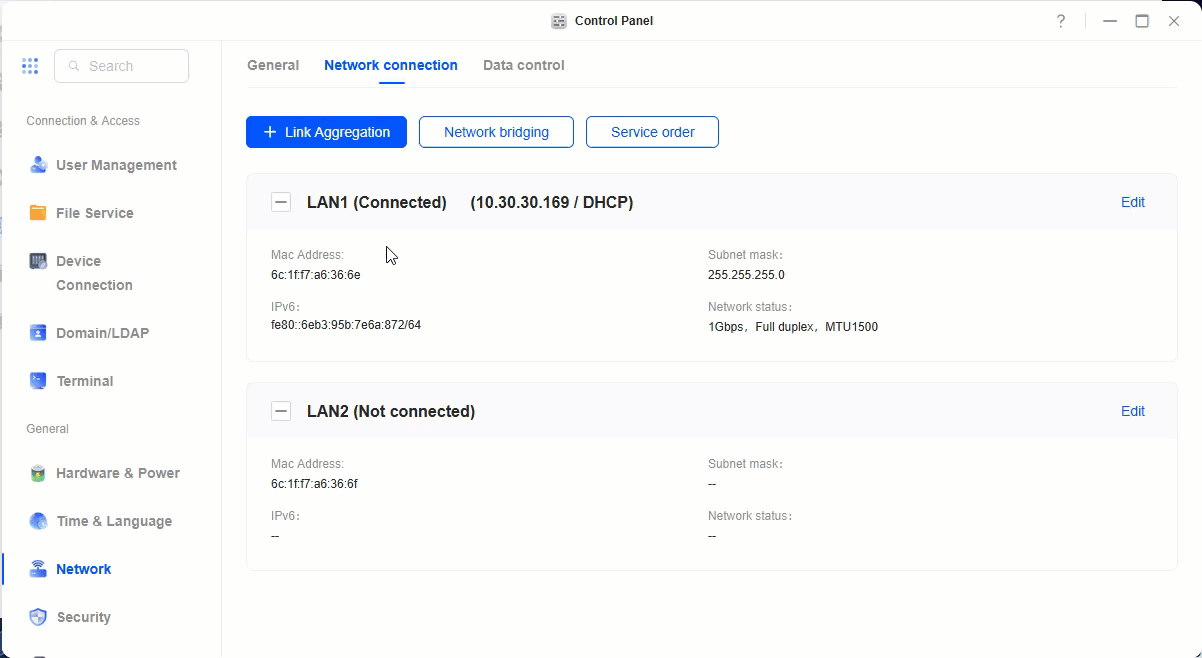
- Click on add network bridge -> virtual bridging -> Enable bridging -> select your network card which is connected. -> apply.
- Now you will have a virtual bridge created, go back to the previous menu and you will see you have a network card you can select. Select the card and click confirm.
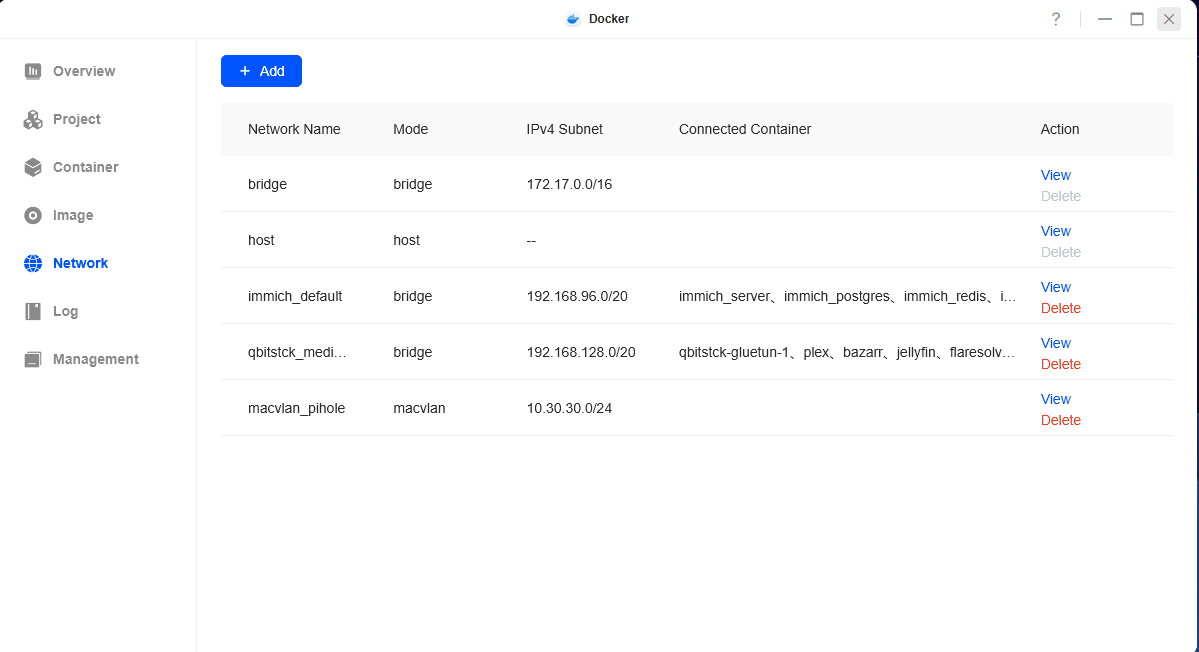
Thats it , you should see a macvlan network with the name of macvlan_pihole in your network list now.
Our Docker Compose file
We will use the following docker file. Copy this for Step 2. I have added a few key points below , you can skip it if you just want to copy
TZis your timezone, you can change it so logs show correct timeFTLCONF_webserver_api_passwordis the pihole admin console password. change it to a secure password./etc-piholeis a directory that will hold our configuration. it will be created in the project directoryipv4_addressThis is the most important bit. You have to use an unused ip addres in teh same subnet your NAS is in. this is the ip that your pihole container will get- We use 2 networks. Pihole gets access to both
macvlan_piholeandinternal_dnsIt will get its own ip address withmacvlan_piholeand will connect to unbound withinternal_dns. Unbound only gets access tointernal_dns
services:
  pihole:
    image: pihole/pihole:latest
    container_name: pihole_2
    restart: unless-stopped

    environment:
      TZ: "Asia/Dubai" # user your timezone
      FTLCONF_webserver_api_password: "CHANGE_ME" # use a secure password here
      FTLCONF_dns_listeningMode: "ALL"

    volumes:
      - ./etc-pihole:/etc/pihole

    cap_add:
      - SYS_NICE

    depends_on:
      - unbound

    networks:
      macvlan_pihole:
        ipv4_address: 10.30.30.55  # use an unused ip within your subnet.
      internal_dns:

  unbound:
    image: mvance/unbound:latest
    container_name: unbound
    restart: unless-stopped

    networks:
      - internal_dns

networks:
  macvlan_pihole:
    external: true
  internal_dns:
    driver: bridge
Step 2 : Create an App with compose
- Go to docker app
- Click on project -> add
- Give it a name, paste the compose file you copied (with changes) in the yaml area and hit create
Step 3 : Configure upstream dns in pihole
access your pihole on the ip address you used in ipv4_address in your compose file. exact url to access is http://ipv4_address/admin/login using the FTLCONF_webserver_api_password that you defined in your compose
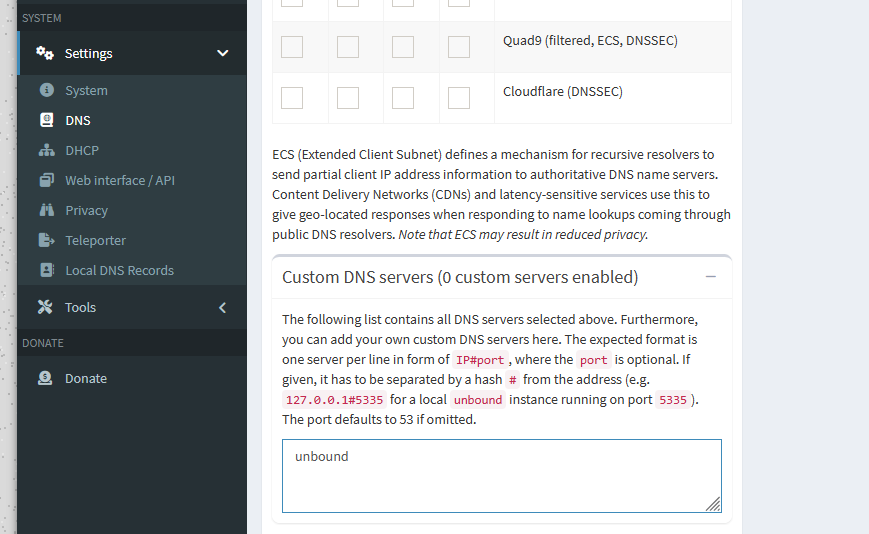
Go to settings -> dns. Scroll down to custom DNS servers, delete all the entries here and use unbound name. Since pihole and unbound are on same bridge network they can refer to each other with their hostnames.
Thats it. Now you can configure your DNS server to be the ipv4_address that you used in your compose file and ads will be blocked. pihole will also use unbound to resolve your dns requests privately.